Background Switcher (Hidden)

Showing posts with label masking compound. Show all posts

Watercolor Workshop-Finishing the Osprey Painting

Saturday, February 25, 2017

1 comments

This is the second part of a two-part post, a step-by-step of a scene depicting a Scottish osprey spending his winter in Senegal. It’s for an upcoming book by Alan Poole.  

Here is an ultra close up of the beach and wave interface. You can see the masking fluid, dried, still adhering to the paper. You can also see that I’ve sprinkled kosher salt into the dark wet wash. Salt is hydrophilic; it attracts water. With the water travels the granules of pigment, and as the water dries around the salt crystals, wonderful things happen. The salt grain resists the pigment, so there’s a little star or snowflake effect around each grain. The bigger the grain, the bigger the salt snowflake it makes. For some applications I use table salt; for this I wanted kosher (larger grain). I keep kosher salt around in a shallow dish on my stovetop. I like to pick it up in my fingers and throw it in whatever I’m cooking. My fingers are extraordinarily good at knowing just how much salt I’m using; it’s a lot less work and has less uncertainty than a shaker.


 Time for that masking fluid to come off. I peel it off with my thumb. I’ve really gone crazy on these waves, leaving myself a lot of work to integrate the masked areas into the painting. The hard-edged crests will soon be softened by scrubbing with a wet brush and clear water.
Some nice cloud shadow action here. I use the same colors I used in the water and sand, because the clouds are bouncing light from the water. So their bellies will be ocean-colored. Just for fun, I masked the upper edges of the clouds, to give that hard silver lining you see in backlit clouds. 


 All that foreground trash waits to be painted. I’m leaving the horsecarts and the bird for dessert!

 Dune grass, and I’m beginning work on the wave crests. The painting is beginning to come together. My favorite part is still the water/sky interface.


That is, until I get to the horsecarts! Oops, I’ve done it again—painted without shooting progress photos. Got a lot done, too! You’ll notice how much softer those wave crests look. I’ve busily scrubbed them out with a clean wet brush. And suddenly, it’s a whole lot windier—the brilliantly lit clouds, the smeared wave crests, and the diagonal directionality in the sky wash all work together to evoke high winds, typical of coastal areas. I’m pleased about that. Of course, painting the horsecarts is the most fun of all. I manange to discern some of the crops—onions and turnips, maybe? I have a guy in close who’s already headed back from market, perhaps having sold out early. I turn his head so he seems to be looking at this exotic visitor from Scotland.


The finished painting. I’ve used the foreground trash to echo the colors of the pony carts and the sea, to lead the eye toward the main subjects of the painting. Now I can hear the surf pounding. I can feel the wind and taste the salt. I can hear the shouts of the vendors. And through it all the osprey sits, pleasantly phlegmatic, unperturbed, spending his winter dining on fresh catch of the day in a place entirely unlike Scotland.


Watercolor Painting Workshop-Osprey!

Wednesday, February 22, 2017

2 comments
I’ve been blessed with a commission, doing five or so paintings for an upcoming book by Alan Poole, one of the world’s foremost authorities on ospreys. You may remember him, last seen cooking local bay scallops for me and Erin in his lovely coastal Massachusetts home. I’ve worked with Alan for a decade starting in 1991, in his former capacity as Editor of The Birds of North America: Life Histories for the 21st Century. I got to draw North American birds doing things that were hard to depict in photographs. Drawing birds for ornithologists was a blast, and made for a nice steady trickle of income in a freelancer’s life. I drew a lot of nest scenes, good training for doing the paintings for Baby Birds.

Alan wanted me to paint some scenes that couldn’t really be depicted well in photographs. Oh boy. Perfect assignment for me! We batted about ideas for illustrations and came up with a short list. The first one I tackled was ambitious, but I hadn’t done a painting in several months and I was jonesing for a watercolor adventure.

Ospreys from Great Britain and elsewhere often spend their winters on Africa’s west coast. One area, Lompoul Sur Mer in Senegal, hosts good numbers of ospreys, who share the beaches with lots of people. We’ve found this out through satellite tracking of little solar-powered packs on a harness between the bird’s powerful shoulders. Alan and I decided we didn’t need  to depict an antenna sticking off the bird, but that’s how we know they go to this part of Africa.


At Lompoul Sur Mer, the packed sand near the tideline serves as a handy road for vendors traveling to and from farmer’s markets. I was delighted at the prospect of painting an osprey with an ocean backdrop, populated with colorful vegetable carts, people and horses. Here, the Google image search stood me in good stead, and I found lots of drool-worthy images to mix, match and combine in a composition that would evoke the place. Though I’ve never been to Africa’s west coast, I have dipped my toes in the Indian Ocean off South Africa, and I was eager to paint this scene.

Masking. Any complex watercolor of mine is going to involve masking fluid and film. So I may paint freely and quickly, I spend a lot of time masking off areas I don’t want to get covered with color. This would include the bird, wave crests, horses, carts, people and garbage. Like it or not, the photos I found from Lompoul Sur Mer had a lot of garbage in them. I’d try to find a way to work it into the composition without its being too distracting or ugly. It's part of the story, too.


Three ways to mask: Kraft paper covers my ocean and sky; masking film covers the horse and cart; and masking fluid protects the garbage. Now I’m spatter-painting with a toothbrush, as well as flinging paint off a watercolor round brush. I’ve laid down a basic background wash for the dunes and main beach flat, and I’m throwing paint into it as it dries. Obviously, the paint thrown on wet areas is going to feather out and spread, and paint thrown on drier areas will stay put as droplets. If I make a spatter I don’t like, it’s no problem to suck it back up with a damp brush. Lots of fun, and no worries or pressure in this kind of work.


This always happens when I’m painting skies and water. I get carried away and forget to take progress shots. More to the point, I simply can’t stop long enough to shoot a photo—it’s the fast, wet work in watercolor that makes it so special.  I've gone ahead and put in the ocean and the sky, too--the work of less than an hour. 


When I get the ocean and sky wash laid in, you can see just how much masking I’ve done to prepare this painting.
Speaking of working fast, there are wonderful things that happen when a brush drags once across damp and drying paper. 


These marks are called “scumbling” and they’re among the things that make watercolor my favorite medium. Just like that, the brush drags across the rough tops, the teeth of the paper’s surface, and you have sparkles dancing over the water where the sun is glancing in the distance. Or you have little mackerel clouds. Boom. And all you did was lighten up on the pressure as you quickly dragged the brush across.

These are the elements—the little “mistakes” and omissions of paint—that caused early critics of Winslow Homer’s work to label it “primitive” or “savage.” Nothing of the sort. They just didn’t know how to appreciate watercolor.


Next up: Finishing the painting: tricks, tips, and techniques.

A Painting for Sara: Watercolor Demo

Thursday, November 10, 2016

6 comments
For years, I've been painting a scene each year for the Wilson Ornithological Society's Willliam and Nancy Klamm Service Award recipient. I get to paint their favorite birds for ornithologists. I love doing that. Always love a challenge, and a keen audience. I've painted everything from goldfinches to great tinamous, and have loved every second of it.


This was 2011's Klamm award for Dr. Charles Blem and Leann Blem. They did the definitive nesting study of  prothonotary warblers, and gave outstanding service to the Wilson Ornithological Society. I knew I wanted to paint something that evoked nesting, and I had this notion of a bird tugging at the wiry petioles of red maple flowers. First I had to find out if they used those in their nests, and then if male prothonotaries gather nesting material. Affirmative on both counts. I knew I wanted a dark, rather dull-colored background for the glowing orange bird. So I chose the water's surface on a dark and rainy day. The Blems loved the painting. Score!

In 2010, Dr. Jerome Jackson, pre-eminent expert on ivory-billed woodpeckers, received the award. 
I'd worked closely with him to create this painting for an article he'd written for The Auk, the journal of the American Ornithologists' Union.  It would be the cover of the journal. The emails, sketches and jpegs flew between us, and it was a thrill, honor and delight to collaborate with Dr. Jackson on this rather complex painting. (The reflection of the flying bird drove me NUTS). So it was a great surprise for him to receive the original as his award!


Well, Sara Morris, who is the ornithologist and college professor who has been commissioning these paintings all these years, and who has been the one to deal with me and also the one who gets to open the big flat box when it's all done, wanted a painting for herself at long last. She had been given the Koessler Distinguished Faculty Award at Canisius College in Buffalo, New York, where she lights the intellectual fires of students every day. And she decided to use the award to commission a painting from me! 

  I cackled with glee at the prospect of painting something for Sara. She loves all the same birds I do. Would it be a collared redstart, a Blackburnian warbler, or a magnolia warbler?

Magnolia warbler finally won out. Whoot!! I love those little birds! I was down for it. And I knew I wanted to create a scene that evoked the sights and scents of Hog Island Audubon Camp off Bremen, Maine, to which Sara has devoted so much of her expertise and enthusiasm and knowledge over the years. 


It doesn't look like much, I know, but it's all encoded in the first concept sketch. I love this stage of creating a painting.  Looking at it, I shoulda stuck closer to this composition! Ah well. 


Would the male be singing? The female looking on adoringly? Hmm.


No, I don't think so. The female would be making her own weather, and she'd be front and center, because I've heard Dr. Morris give a wonderful talk about female birds and why they look and act as they do.

All that worked out, it was time to draw the forest and ferns.

  
You can see the masking film over the birds, and some of the masking fluid on tree trunks and branches.
 It's all dry and ready to be painted over. 

I'd mask out some tree trunks, and some areas that I wanted to be lit by sun, and the birds, of course. I was thinking hard about what order I'd paint everything. I burn a lot of mental wood in this construction phase.  In the photo above, I've put a few tentative needles on paper, and the ugly truth has hit me that these spruce branches are going to look like they're floating on air if I don't mask at least some of those needles out and lay a good juicy background wash behind them.  Then,  once it dries, I'll paint the dark needles right atop the background wash.  The ones I've masked out will survive the background wash, and be lighter in tone than it will be. Crappity crap crap. Ugh. I hate masking needles. But mask I did.  I promised myself I wouldn't get totally anal about it and mask every damn needle. Been there, done that. 


Kissing that test branch goodbye, I sprayed down the stretched sheet of watercolor paper with clear water. Quickly and boldly, I painted in the sky and water wash. Not much of it would show in the finished painting, but I needed to have light, bright sky and water blue coming through the trees. 


While everything was wettish, I laid in the sunshine. It looks really weird, I know, but you have to paint the lightest, brightest values first, and really juice them up, because watercolor dries paler than it goes on. You can always darken something, but it's really hard to lighten something. This stage of the painting amazes me, because it looks nothing at all like the finished piece. That's part of what's so cool about taking photos as you go. You can capture your terror on beholding what you've wrought.


While that was wet, I laid in some dark areas. You can see now that I masked out some understory trash and hay-scented ferns in the lower right corner. Quickly, I brought in some dark green shadows so those masked features would pop out when I finally removed the mask and painted them. It's the wet on wet work that gives this area such life. 

Time to define the path through the ferns. Some darker green and some spruce-needle flooring goes in. 


This wet on wet work is really fun, but it's also a bit nerve wracking, because you're juggling so many things at once, before everything dries and you can't get those beautiful diffuse washes any more. See the masked-out edges on the upper right of the ferns? Those are going to be bright yellow, like sun, later on. 


I continue hacking away at the distant trees. That's kind of fun, because I keep it pretty loose. I'm basically just printing the patterns with the tip of a large flat brush. I am definitely not giving this forest an every-needle treatment. It's going to be hard enough work just painting masses of foliage.  You can see the masked masses of foliage shining through the dark background trees. 


I take a break to photograph a robin who has plopped into the midst of my Gartenmeister fuchsia. Wow. It's so beautiful out there, so many birds flying through. That looks like a painting itself. Robins. SO beautiful. So lucky to have this thrush be a common bird. But I always drop everything when there's one on the lawn out my studio window, or dipping into the Bird Spa. 


I keep filling in the forest. Then I start on the near spruce branches. I want to get them done, and forget to take photos as I work.  You can see the masked needles sticking out as pale in the photo below. 


I peel off the masking fluid and paint in the paler needles in the branch clusters. I'm really glad I took the time to mask them out, lay in a good background wash, and paint the branches carefully, because they're going to have to hold the birds up, so they need to have a certain amount of realism so they're as believable as the birds. 


I peel off the masking compound in the background forest. At this point the forest looks like absolute crap, but I will save it. So much to do yet.

This is my process. I throw some fat into the fire, it flares up, I pull it back out. Repeat until painting is under control or goes up in flames.


Honestly, I haven't had a painting go up in flames in years. I am a dogged thinker and worker. By the time brush and paint hit wet paper, I've thought out most of the pitfalls I know I'll run into, and I'm ready for them. (But see branch masking debacle, above. It's always somethin'). Ach, there's still so much to do, all over this piece. Writing about painting it makes me remember the effort and angst that goes into making something look loose and effortless. Oh, and I worked on this piece off and on from October 27-November 7, getting to the point with each session where I couldn't look at it any more, and going off to do something else. They don't usually take that long, but I don't usually tackle a spruce forest with hay-scented fern understory, either. I knew, even as I planned the painting, that I needed to lose myself for a week or so in the fragrant little universe of Hog Island in summer. 

To be continued...


Three Birds Done, Macaw Supervising

Tuesday, January 29, 2008

21 comments
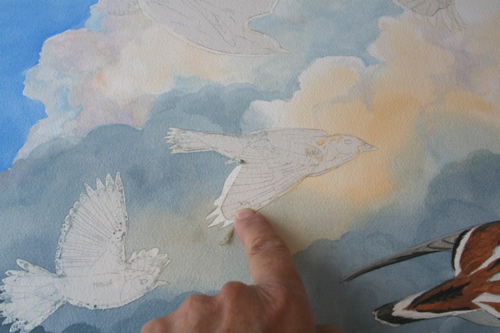
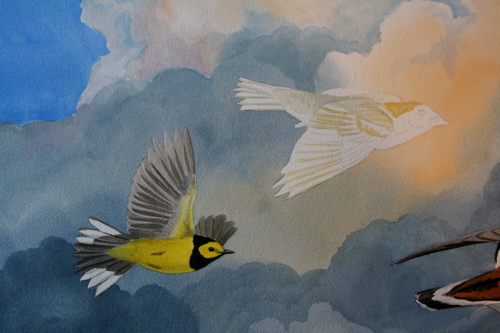
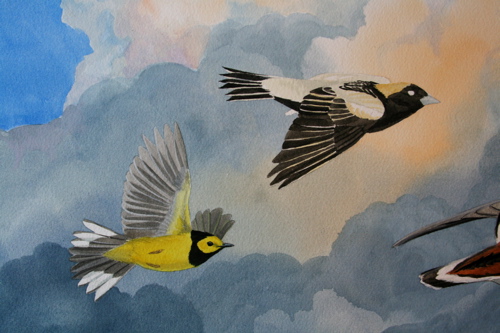
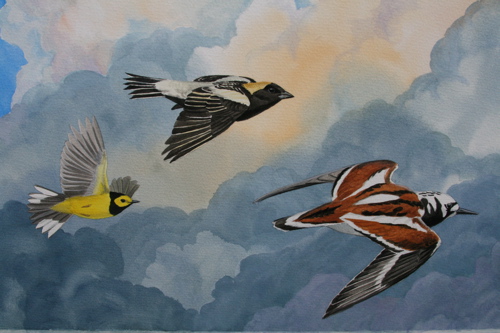
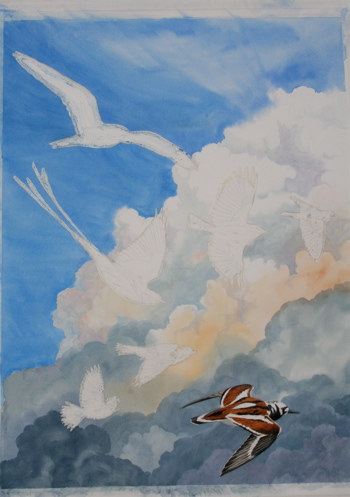
With the turnstone done, it's time to peel off some masking compound. I just roll it off with a clean finger, like rubber cement. Ideally, I've sealed the edges of the lightly tacky masking film well enough so no paint has crept under the edge. It's Day Two of painting now. I forget how many days I put into composing the thing before I could start painting. Let's just say many. That's the most time-consuming part, because that's where all the heavy thinking has to happen. Painting is something that either goes well or doesn't, but either way, it goes fast. Not to worry: this painting went well. So well, in fact, that I had up and painted the whole darn hooded warbler before remembering that I was supposed to be taking progress pictures. Well, heck, who wants to stop painting a hooded warbler to take pictures? I have to say, hooded warblers are pretty fast paints. I did his wings and tail first, then painted his yellow. The black hood went on right over the yellow and boom! he was done. I made it sound like the cloud painting went really fast, and it did, but the whole time I was thinking about where the lightest parts of the birds would be, and I was toning the clouds so the darkest parts of the clouds would be where the lightest parts of the birds were. This makes them pop out against the background. See how the warbler's white tail spots stand out against the dark blue cloud top? Elsewhere, I let the bird kind of fade in, as on the upraised wing. You don't want it to look like a cutout. As you can see in the photo above, I had already started on a male bobolink before I stopped to shoot a photo. I'm painting all his pale parts first; his silvery back and cornsilk-yellow nape. That's the proper order in watercolor. Paint light to dark.The black is blocked in, but the bird's far from done. Most of the magic in painting watercolor happens in the last few minutes, when you put little highlights of Chinese white on cheeks and bill and eye, and stroke a thin wash of it over the back to show light falling on it.
A word about light: When I showed this to my group of artist friends (in jpegs, via email), Mike asked about the light source. Where's it coming from? I scratched my head. Good question. The birds are evenly lit overall, and there is no strong directional source of light. The overall effect of the painting is of diffuse light, a kind of weird, pre-storm light. And to be truthful, I wasn't really thinking that much about where the light was coming from. I had a lot of balls to juggle with this piece. I was most concerned with the local colors of the birds, with making a graphic statement with their markings. I wanted to show their colors as vividly as I could, without worrying too much about cast shadows or the direction of the light source.

So I said, "Well, it's kind of a fantasy flock, and I'm thinking about the lighting as being sort of like the lighting in a Celestial Seasonings tea box picture. Too good to be true. You know, pretty...OK, I didn't really think about the lighting very much."

And my friends all said, "That's OK. It works for us."

They're nice that way. But the funny thing is, I think in the end it did work out OK.

And the male bobolink joins his friends in the fantasy flock. I'm so happy with the way the peach flush in the cloud is working with the bobolink's colors.

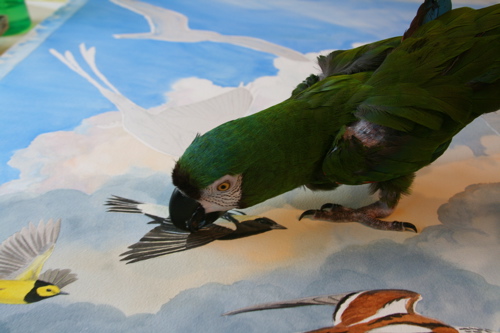
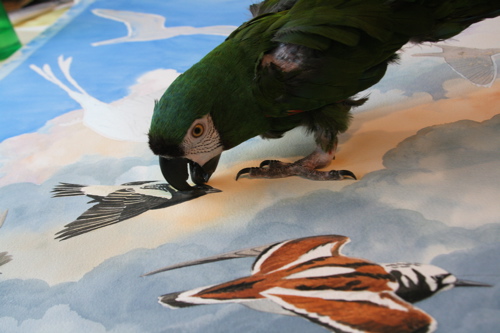
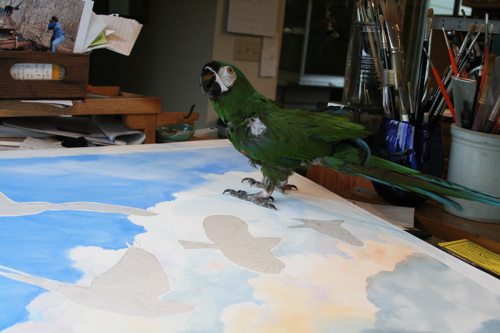
Charlie moves in to preen the bobolink's wing feathers. He loves to watch me paint, and seems to know that the image depicts a bird. And he gets a huge kick out of climbing down off my shoulder and walking around on the art, checking out each new bird as it's painted.

He's always most curious about the eyes. A macaw's tongue is very dry and rubbery, so there's little chance he'll smear anything once the paint dries, and it dries almost instantly in the dry air of winter. I have to spray down my palette every few minutes to keep the paint from hardening as I work.More birds tomorrow!

A Thunderhead in Watercolor

Monday, January 28, 2008

14 comments
Although I took these pictures a couple of months ago and stored them in my ant-ry, I'm writing the commentary now, which should be interesting. So I can give you a grasshopper update. Bill got back from Florida today. Yay. About time. He's completely exhausted and horizontal at the moment. He has a lot of nice Florida pictures, but needs to sleep for about 12 hours before anything much can happen. Hang in there.

I hung in all week, single-momming it. Both kids had fever, sore throat and coughing for most of the last ten days. Once the fever and gurgly cough subsided, the upchucking started. Liam woke me on Saturday in the wee hours with a couple of strangled "Mommy?'s" Never something you want to hear at 1:30 AM. But what you really don't want to hear is the sound of his dinner hitting the Berber carpet right outside your bedroom door. In my struggling-to-awaken mode, I imagined he had just dropped a box of crayons outside my door. No such luck.
Poor little guy was so sick, he didn't think to go, oh, about six inches to his left into the bathroom, which has nice receptacles for catching one's dinner. Sink, toilet, tub, please, any one will do. No, the carpet caught it. He must have taken lessons from his little black-and-white brother, who likes to urp on absorbent, soft surfaces.

By the time Phoebe got to that stage, we were READY and had done a couple of upchuck drills. OK, kids. Look at me. If you feel queasy, head for the bathroom. Got that? Mommy doesn't like using a spatula for anything other than cooking in the kitchen.

All right. We're done with that. Both kids were able to go to school today and they're eating like horses again, no sore throat, no fever, no nausea, no coughing. Life is good. Daddy's home (well, his corporeal body is here.) Down to painting!

The first thing I did, after transferring the drawing onto the full sheet of watercolor paper, was to stretch the paper. I sprayed the back of the paper with water, and put it on a rigid sheet of white foamcore (Miracle Board). It's super lightweight but strong enough to hold against buckling paper. I stuck the paper to the board with white gummed paper tape around the edges and waited for it to stop buckling and stretch taut before doing anything else.

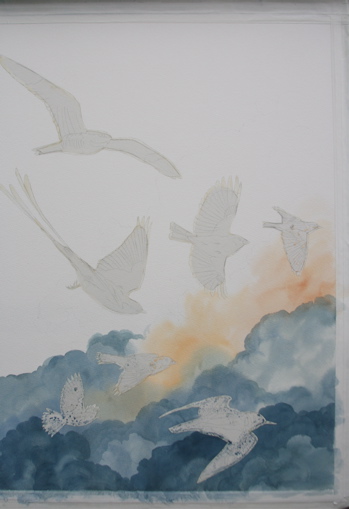
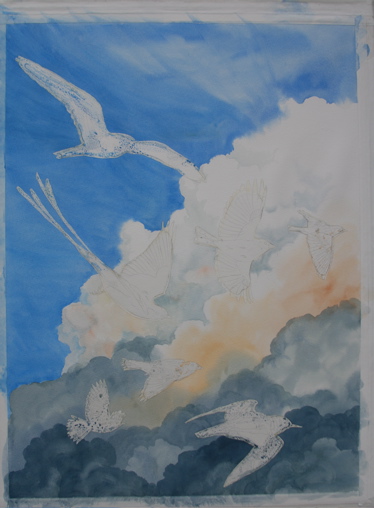
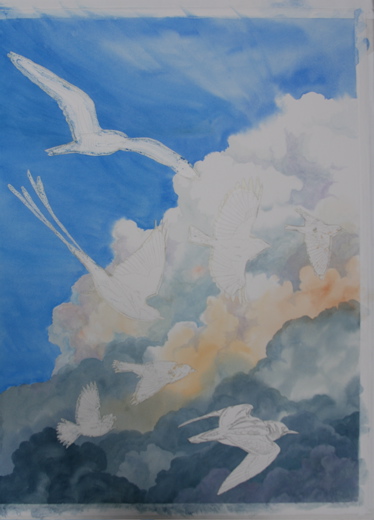
Now it was time to mask the birds. I use a combination of masking film and liquid masking compound. I cut the bird's shape out of film, and use liquid compound to mask all around the edge of the masking film so paint can't creep under the film and ruin the nice white spot I've left for the bird. In this picture, you can see the ghostly shapes of the masked birds. I've started painting my thunderhead at the bottom. I can paint right over the masked birds and not worry about leaving a space for them. When I peel the masking film off, I'll have clean paper to work with.Everything happens really fast now, because the clouds are all painted wet on wet. I move up the page. I'm trying for that peachy glow some thunderheads get when they look as if they're lit from within. I also want that hard-edged look they get when they stack up against a blue sky. So I lay in the blue sky, making random cloud edge shapes as I go. Yikes, this is a big piece of paper. I decide as I'm manipulating this enormous blue wash--remember, the nighthawk is almost life-size, a foot across--that I don't want the whole cloud edge to look hard. So I decide to drop a load of clear water on the white cloud shape, and streak it into the blue, and I scrub out a bit of the blue to suggest filmy high clouds behind the thunderhead. That's better. I like the smeary edges that wind makes when it blows over the top of big clouds. Now the cloud looks like it's communicating with the sky, instead of just standing in front of it.

I have to leave the blue sky alone now, and let it dry. I step back and study the painting. I think I've gone too far on the dark clouds at the bottom. They're too dark to look believable. So I take a wash of Chinese white and cobalt violet over the darkest ones, underneath the turnstone's wing. Yeah, that's better.

Charlie approves. Yes, he walks on my big paintings. And no, I'm not worried that he'll poop on them, because parrots like to poop into space, and only poop on a surface they're standing on if they can't hold it any longer. Budgies, on the other hand, will poop anywhere, so when I had a free-flying budgie, I had to put paper down over my paintings as I worked. I do make sure that he hasn't recently eaten pomegranate or cherries, and sometimes I wash his feet before I let him stomp across my paintings. But that's one awfully nice thing about watercolor--it isn't messy or toxic and it dries fast.
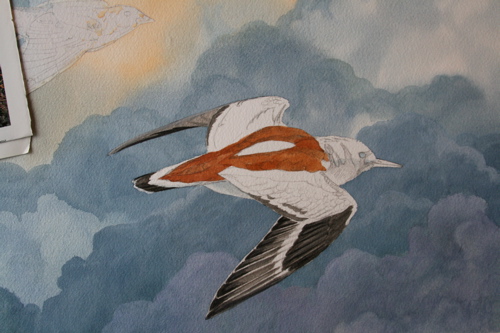
Time to paint the turnstone. Oh, now the fun starts. Painting the clouds is fun, but it's also kind of nervewracking because I had to do it so fast--within an hour or two. I want the cloudscape to look like watercolor, and I don't want to noodle away at it making it perfect. I want this to look like a painting in the end.

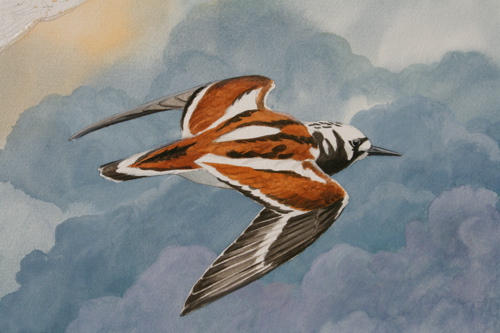
In transparent watercolor, you leave white paper for the whites. I shade them a bit to model the form, but there's no white paint on this turnstone. So I tint the white shadows, and move on to the rusty back. Black is the last color to go in. I chose a turnstone for the bottom of the page because his bold colors and black wings will help add weight to the bottom of the painting.Within about an hour, the turnstone is finished. Well, it's been a good first day; sky and clouds done, and the first bird in my fantasy flock done. See that violet wash on the too-dark cloud? I wanted a color that would complement the turnstone's red. That and the slate-blue seem to work well with his colors.
I take it outside, prop it against the house, and shoot it. What fun to see it evolve! With one bird in, I can imagine what it will look like with each bird I add.
Mo' birdies tomorrow, and, I hope, no mo' Technicolor mommybloggin'.
[Back to Top]