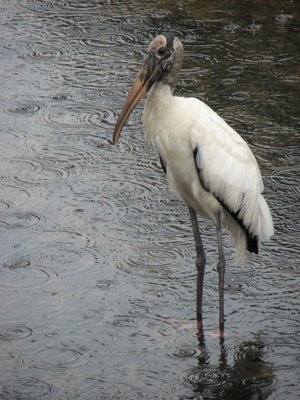
 At this point I think it would be illuminating to show you the photo I was asked to work from. It's really wonderful, quite moody. When I first saw it I despaired of being able to capture the rainy feeling and especially those concentric circles. And it was daunting, too, because the ripples are dark lines on a light ground, and almost imperceptibly they transition to pale lines on a dark ground. Yeeks! The biggest part of translating a photo into a painting is having to figure out what's going on in the photo, and then figuring out how you're going to do that in a painting.
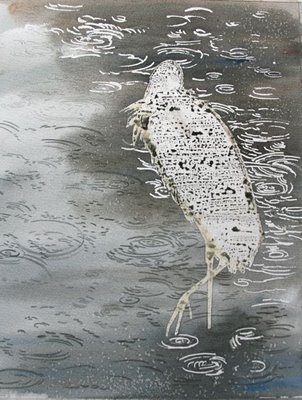 I started on the ripples by painting the ones on the left side of the page, the easy ones, which are dark lines on pale water. I varied their intensity and hue so they wouldn't look mechanical. I made the ripples in the foreground a bit darker than the ones farther back, so the distant ones would recede. Speaking of receding, the masked ripples were terribly, brightly white when I peeled the compound off. Yuck. I knew that would happen, but it was still kind of a bummer. I'd have to go over each one with a wash the same color as the pale water, to calm them down and allow the stork to be the most prominent element of the painting. Doing this would also tie the two halves of the painting together, with pale gray-blue being the uniting element.
Peeling the masking film off the stork helped me see how to tone the ripples behind it. The dark puddles of pigment on the masking film, left from my brushstrokes while painting the wash, were distracting me. Once that was off, I set about toning the ripples and calming down those awful white rings.
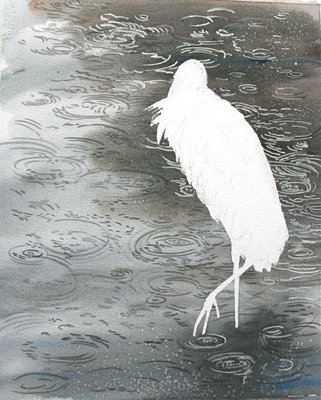 Working much better. I don't want the painting to be all about the ripples. Toning them down helped.
With the water under control, I was ready to wet the bird down with clear water and start painting it. I always use an ancient brush I got at Pearl Paint in the 80's for this. Don't know why. Lucky brush. Holds a lot of water.
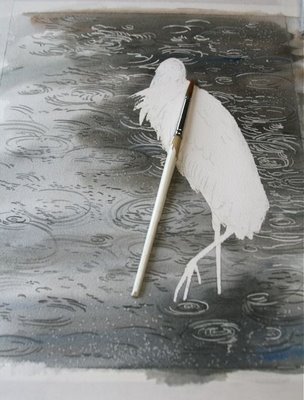 I can hardly wait to start on the bird. Tomorrow, tomorrow, I love ya, tomorrow...





11 comments:
You appear to have painted the bird in a different pose than the actual one in the photo (which looks like an EASIER pose to paint!) -- will you be explaining that decision at some point?
The way you posed your bird in your painting is so much more interesting than the actual photo! It has so much personality. It's not just standing there, it's telling a story. It shows how much you know your subject. Beautiful, love it!
Yes, Cyberthrush, I'll talk about that tomorrow. Thank you, Tricia. I thought the new pose was an improvement, too.
I love the movement of the bird and the feeling of rain, but those ripples are awesome!
I really appreciate your step-by-step explanation. I still remember being distraught when my high school art teacher assigned a drawing of ice cubes in a glass of water. That took forever to figure out - at least for me!
Kathleen, I'd probably have to think about ice cubes in a glass of water for about a month...
no wonder kids get discouraged with art!
I remember getting my watercolors out and tackling my first glass vase with water and daffodils in it. Once you stop hyperventilating it can be fun...
I can't even begin to imagine working in head how it should look and what I'd have to do to make it look like that. Your brain amazes me Julie!
Wow! I have always envied painters, since I can't draw anything more complicated than a heart, rainbow, and stick people (my skills stopped in kindergarten). Now that I have seen some of the explanations of how it happens, I am even more impressed! I love photography - my medium of choice and ability - but now I sure wish I could paint!
Awesome painting. Love dem ruby slippers.
I love dem ruby slippers, too.
You captured the water wonderfully!
Post a Comment